Friday, February 24, 2012

Eagle Boy Scout Quilt

I was inspired by my cousin to make a quilt for my son when he became and Eagle Scout to honor the special event. She had found a pattern designed by Quilt It editor Angie Hodapp in a magazine and sent me a copy of the directions. Below are two shots of one of her quilts (she made two) using Boy Scout fabric and a few embellishments. It looks like she had this professionally quilted. She used fabric markers to created the eagle and the Eagle medal and appliqued these on her quilts. I chose not to use those on my son's.


I decided to change the colors of my quilt to suit my tastes and I didn't use all Boy Scout fabrics. I was going for a different look from my cousin's original design. Instead of appliqueing the stars on the quilt squares I chose to paper piece my stars (I'm not very good at applique and stay away from it as much as possible). Below is a photo of my finished quilt.


I also used a vintage Boy Scout fabric for the entire back. The blue fabric with the badges (used on the wide border of my front) had a section of fabric with the word TROOP and all the numbers, so I pieced a line on the back of red fabric and used Troop 4 and Troop 278, the two Boy Scout troops my son had been a part of.


In the bottom left corner I used an iron-on label to print on and added it after quilting the piece.


Below are the fabric and cutting requirements for my quilt if you did applique

Block size: 6"       Quilt size: 58"x70"

Yardage is based on 42"-wide fabric. The yardage in parentheses is for borders cut crosswise and pieced.

Fabric                       Yard                    Cut
Red                              5/8                    16A
Blue Novelty Print     1 5/8                     2 side borders 6 1/2"x54 1/2"
                                                               2 top and bottom borders 6 1/2"x42 1/2"
Gold Print                 1 1/8                     7 strips binding 2 1/4"x42", 20 stars (I actually used an
                                                               additional olive fabric for my final binding.)
Brown/Stars               1 3/8                     20A, 16 stars (I actually used a light tan for 20A)
Tan Stripe                     5/8                     31B
Red Print                  2 (5/8)                   2 side borders 2 1/2"x66 1/2"
                                                              2 top and bottom borders 2 1/2"x58 1/2"
Dk Green         1 1/4 or 5 fat 1/4's       62B
Backing                     3 5/8                   2 horizontal panels 38"x62"
Batting                                                  62"x74"

Border dimensions are the exact length required plus seam allowances.
Also need 2 yards lightweight fusible web for fusible applique

ASSEMBLY:

Wash and press the fabrics and cut according to directions


Prepare the stars for fusible applique referring to diagrams. Fuse stars to the A patches. Finish the edges of the stars. Make 20 X blocks and 16 Y blocks. My X blocks were brown on tan and my Y blocks were gold on red. My Z blocks were olive-tan-olive.

Referring to the Z block diagram sew a tan B between 2 olive B's mixing up the prints to keep the text upright. Press the seam allowances away from tan. Make 31 Z blocks. 

Referring to the quilt assembly, arrange the X, Y, and Z blocks into 9 rows, rotating the Z blocks and alternating the stars as shown. Press seam allowances away from the Z blocks. Join the rows. Press the seam allowances between the rows in one direction.

sorry it's upside-down...but you get the picture


Measure the quilt from top to bottom from raw edge to raw edge. Cut the side blue borders this length. Likewise, measure the quilt from side to side and cut the top and bottom blue borders this length. Matching centers and ends, add the side borders. Press the borders away from the quilt. Sew a Z block to each end of the top and bottom borders. Matching centers, ends, and seams, sew the borders to the quilt.

Sew the side red borders to the quilt and trim if necessary. Add the top and bottom borders and trim as needed.

Layer the quilt backing, batting, and top. Baste. Quilt in the ditch around the blocks. I also stitched around each badge in the border. Bind. I used this tutorial for machine binding. Works fantastic!


MY CHANGES:

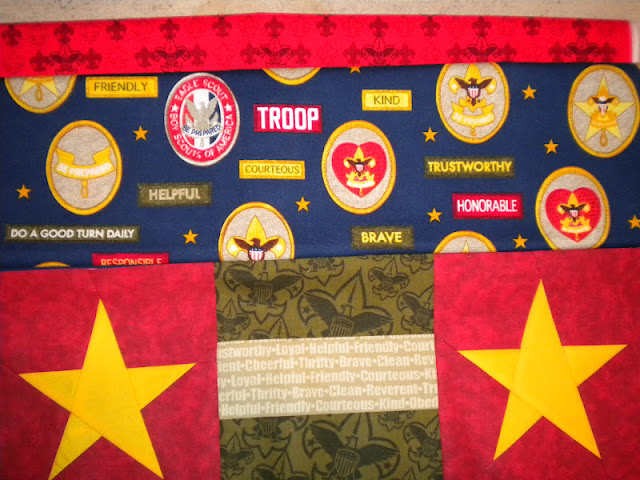
Below is a close-up of some of my fabric from the top row of stars and stripes to get a better idea of the fabrics I used. I did not use Boy Scout fabric for my star squares because the fabric was so cut-up and pieced. 


Here is a close-up of the paper pieced star. I printed off a 5" star shape from Microsoft Word and drew the lines in for piecing. See my tutorial for help in making these squares. MY TUTORIAL


Carolyn "Care Bear" King

Monday, December 5, 2011

Eagle Scout


Here's the front of the invitations I made for my son, Christian's, Eagle Scout Court of Honor. I designed the image on Power Point, printed them at Office Depot, and made a nice card for him to send to his friends. I'm happy with how it turned out.  


Here's the inside text of the invitation. I've blocked out the phone and e-mail address for security reasons.


And HERE'S the photo of the actual Eagle Scout.

Carolyn "Care Bear" King
Friday, December 2, 2011

Raspberry Liqueur 2011

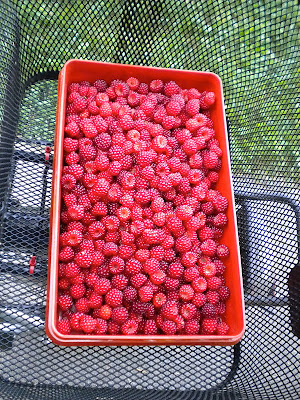
In July I picked bunches of raspberries in the local park by my house. There are plenty of bushes all around, and they're so delicious. Since I had so many, I decided to make Raspberry Liqueur to bottle for Christmas gifts this year. Below you can see the raspberries I found. They are certainly nowhere near the size of the ones you buy in the grocery store, but they make delicious liqueur! I carried them home in a basket on the back of my bike and cleaned them in the kitchen.


The recipe for the liqueur is as follows:

Fruit Liqueur
1 qt raspberries or any fruit
4 C sugar
1 qt gin or vodka

Stir together and set for one week, stirring every other day. Strain twice through nylon stocking. Bottle. Let stand 2 months.


I think I tripled or quadrupled the recipe using both vodka and gin. I also had some strawberries and a vanilla bean I threw in for good measure. I ended up with about 14 1/2 375ml bottles full.


I ordered my labels from  http://www.bottleyourbrand.com/  and was extremely pleased with their quality and ease of application. The bottles I bought were from http://www.weekendbrewer.com/ and cost about $1.16 a bottle with screw on caps at $0.08 each. I was surprised when they were delivered the very next day in perfect condition. I just may have to do this again next year.

Carolyn "Care Bear" King 

Friday, November 25, 2011

Thanksgiving Highlights

Thanksgiving day was wonderful. The night before we made pumpkin pies. I rolled out the crusts while my husband mixed up the filling.


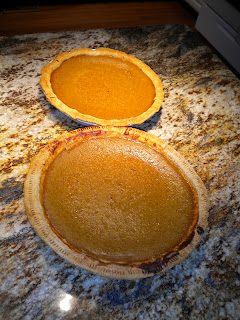
The pies turned out beautifully and tasted delicious!


The morning of Thanksgiving I set the table and got things ready. Some of the side dishes I set out ahead of time. I love these dishes we inherited when my mother-in-law passed away. The just look and feel like Thanksgiving.


I brined my turkey overnight in a solution of 4 quarts pineapple juice, 2 cups brown sugar, 1 1/3 cup soy sauce, 1 1/2 cups kosher salt; 6 garlic cloves cut in half, and 4-6 whole bay leaves. I soaked it for 12 hours for a 12 pound bird. I trussed the turkey according to  Alton Brown's you-tube video. I cooked it for 30 minutes in a 500 degree oven (unfortunately I had the rack too high so the skin got a little dark; I'm not supposed to eat the skin anyways); then lowered the heat to 350 and placed an aluminum foil skin over the white meat and cooked until the thermometer in the breast was 161 degrees (about another 1 1/2 hours). I'm making detailed notes here so I can repeat process in 2012. This way I don't have to rack my brain trying to remember how I made it so good this year....and let me tell you, it was delicious!!!!!! The white meat was sooooo juicy, and I'm not usually a white meat lover.


We started the meal with Harvest Squash and Mushroom soup garnished with yogurt and slivered almonds. Note to self: the children HATE this. We followed it with a spinach salad which the kids did consume.


Two of my side dishes were sweet potato casserole (there are sweet potatoes under all that brown sugar and pecan crust) and green bean casserole which I doctored up with sour cream and cheddar cheese....yummy!


The cows came up to the fence and ate some leaves and grass before moving off. I love my adirondack chairs! Don't you?


Carolyn "Care Bear" King


Thursday, November 24, 2011

Placing the Rocks

We purchased 4 boulders from the local stone company and they weighed in at over 4000 lbs. The first one, pictured here, was placed in the upper retaining area in the planting bed under the red maple tree. We planted 50 baby vinca plants all around it. I can hardly wait until everything grows in next summer.


The next rock was so heavy the contractor had his employee lay on top of the Bobcat as he brought the boulder down the hill to try to keep it level. They looked like they were having fun!


It was murder trying to get the big boulder up over the patio edge. After several tries and failures with the little Bobcat, the contractor went to get the big Bobcat and that worked. The second boulder is actually going to be a water feature in the planting bed. The stone yard drilled a hole in the rock and inserted a tube for water to spill out.


Above on the left you can see the water box (covered in cardboard) in a rectangle hole in the planting bed. A close up of the water rock is on the right. It's currently waiting to be placed on top of the box after it is completely installed. Also on the left you can see in the distance our new set of adirondack chairs under the trees in the lowest bed. I've wanted these chairs for almost my entire marriage, and now I have a set. Woo hoo!


The third rock was at the bottom of the sloping hill and is used to deflect a pipe of water that is draining from our gutters and driveway. It actually got placed upside down, but we like it better this way.


Some more shots of the guys getting it in the right place.


Here are some shots of the rock from a distance without the additional shrubbery. And below are several shots after we planted several bushes and moss around the rock.


 Below the fourth rock is next to the potting shed on the way down from the garage side of the house. The picture on the left shows before I planted all the bushes and moss around it and the shot on the right show it after. We're still waiting for all the grass to grow in and the fence to be installed. Hmmm....I wonder when that'll happen.
Feel free to look at older posts (mostly in August) to see many of the before and during pictures of the hardscape process.


Carolyn "Care Bear" King